###xml setting could be like below:
    <domain type ="kvm">
      <uuid>1b87fb8f-442c-4682-b693-b38612342cd1</uuid>      // should be unique
      <name>node3_1 </name>
      <memory>524288 </memory>
      <vcpu>1 </vcpu>
      <cputune>                                               // virsh vcpupin
        <vcpupin vcpu='0' cpuset ='4'/>
      </cputune>
      <os>
        <type>hvm </type>
        <boot dev="hd" />
      </os>
      <features>
        <acpi/>
      </features>
      <clock offset="utc" >
        <timer name="pit" tickpolicy ="delay"/>
        <timer name="rtc" tickpolicy ="catchup"/>
      </clock>
      <cpu mode="host-model" match="exact" />
      <devices>
        <disk type="file" device ="disk">                     // os disk
          <driver name ="qemu" type="raw" cache="none" />
          <source file ="/var/lib/instances/node3_1/instance.img" />
          <target bus ="virtio" dev="vda"/>
        </disk>
        <hostdev mode='subsystem' type ='pci' managed='yes'>  // nic setting
          <source>
            <address domain ='0x0000' bus='0x04' slot='0x10' function ='0x0'/>
          </source>
          <address type ='pci' domain='0x0000' bus='0x00' slot ='0x05' function='0x0' />
        </hostdev>
        <serial type="pty" />
        <input type="tablet" bus ="usb"/>
        <graphics type="vnc" autoport ="yes" keymap="en-us" listen="0.0.0.0" />
      </devices>
    </domain>
###VM Creation by Virsh
- make nic setting is right(SR-IOV, OpenVSwitch)
- BIOS enables VT
- virsh create libvirt.xml
- virsh attach-device domain disk.xml 4.1 Create your own rbd device(rbd info volume-name) 4.2 According to below xml , attach your device
###disk xml could be like below:
    <disk type='network' device ='disk'>
      <driver name ='qemu' type='raw' cache='none' />
      <source protocol ='rbd' name='xiaoxi/volume-79ee1e33-0353-4e22-bf98-d81a91b2c283:debug_rbd=1:debug_client=1:debug_objecter=1:debug_striper=1:log_to_stderr=true' />
      <target dev ='vdb' bus='virtio'/>
      <serial>79ee1e33-0353-4e22-bf98-d81a91b2c283</serial>
      <alias name ='virtio-disk1'/>
      <address type ='pci' domain='0x0000' bus='0x00' slot ='0x06' function='0x0' />
    </disk>
###Using bridge as network interface:
#The primary network interface
auto br0
iface br0 inet dhcp
        bridge_ports eth0
        bridge_stp off
        bridge_fd 0
        bridge_maxwait 0
/etc/init.d/networking restart
<domain type ="kvm">
  <uuid>1b87fb8f-442c-4682-b693-b3866dc20cd3 </uuid>
  <name>node2_1 </name>
  <memory>524288 </memory>
  <vcpu>1 </vcpu>
  <cputune>
    <vcpupin vcpu='0' cpuset ='2'/>
  </cputune>
  <os>
    <type>hvm </type>
    <boot dev="hd" />
  </os>
  <features>
    <acpi/>
  </features>
  <clock offset="utc" >
    <timer name="pit" tickpolicy ="delay"/>
    <timer name="rtc" tickpolicy ="catchup"/>
  </clock>
  <cpu mode="host-model" match="exact" />
  <devices>
    <disk type="file" device ="disk">
      <driver name ="qemu" type="raw" cache="none" />
      <source file ="/opt/instances/node2_1/instance.img" />
      <target bus ="virtio" dev="vda"/>
    </disk>
     <interface type='bridge' >
          <source bridge ='br0'/>
          <mac address ='00:11:22:33:44:55'/>
        </interface>
    <serial type="pty" />
    <input type="tablet" bus ="usb"/>
    <graphics type="vnc" autoport ="yes" keymap="en-us" listen="0.0.0.0" />
  </devices>
</domain>
###extra setting to apparmor:
root@CephXCD1:~# tail -3 /etc/apparmor.d/abstractions/libvirt-qemu
  # for rbd
  /etc/ceph/ceph.conf r,
  /usr/local/lib/* rmix,
root@CephXCD1:~# service apparmor restart
Setting vncserver & vncviewer:
###install vncserver in your hyperviser
root@CephXCD1:~# apt-get install vnc4server
root@CephXCD1:~# adduser vnc
root@CephXCD1:~# /etc/init.d/vncserver
#!/bin/bash
PATH="$PATH:/usr/bin/"
export USER= "vnc"
DISPLAY="1"
DEPTH="16"
GEOMETRY="1024x768"
OPTIONS="-depth ${DEPTH} -geometry ${GEOMETRY} :${DISPLAY}"
. / lib/lsb /init-functions
case "$1" in
start)
log_action_begin_msg "Starting vncserver for user '${USER}' on localhost:${DISPLAY}"
su ${USER} -c "/usr/bin/vncserver ${OPTIONS}"
;;
stop)
log_action_begin_msg "Stoping vncserver for user '${USER}' on localhost:${DISPLAY}"
su ${USER} -c "/usr/bin/vncserver -kill :${DISPLAY}"
;;
restart)
$0 stop
$0 start
;;
esac
exit 0
root@CephXCD1:~# chmod +x vncserver
root@CephXCD1:~# service vncserver start
###configure the client install vnc viewer in a computer with 图形界面, like windows
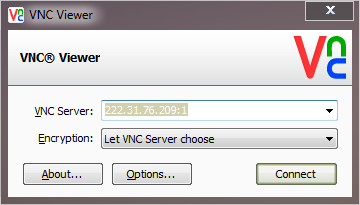
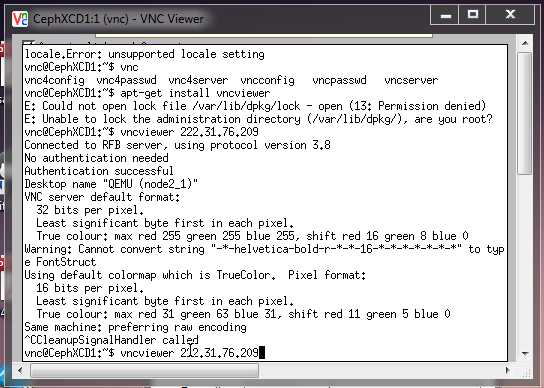
with best luck, you will enter the VM